
🔑 Shortcut: drop.realsnap.ai/canvas You can create Reels-quality fashion content without shooting video. Upload a single image and AI will automatically generate a fashion video with a moving model; add a reference video and it will recreate it as a new video with the same vibe.
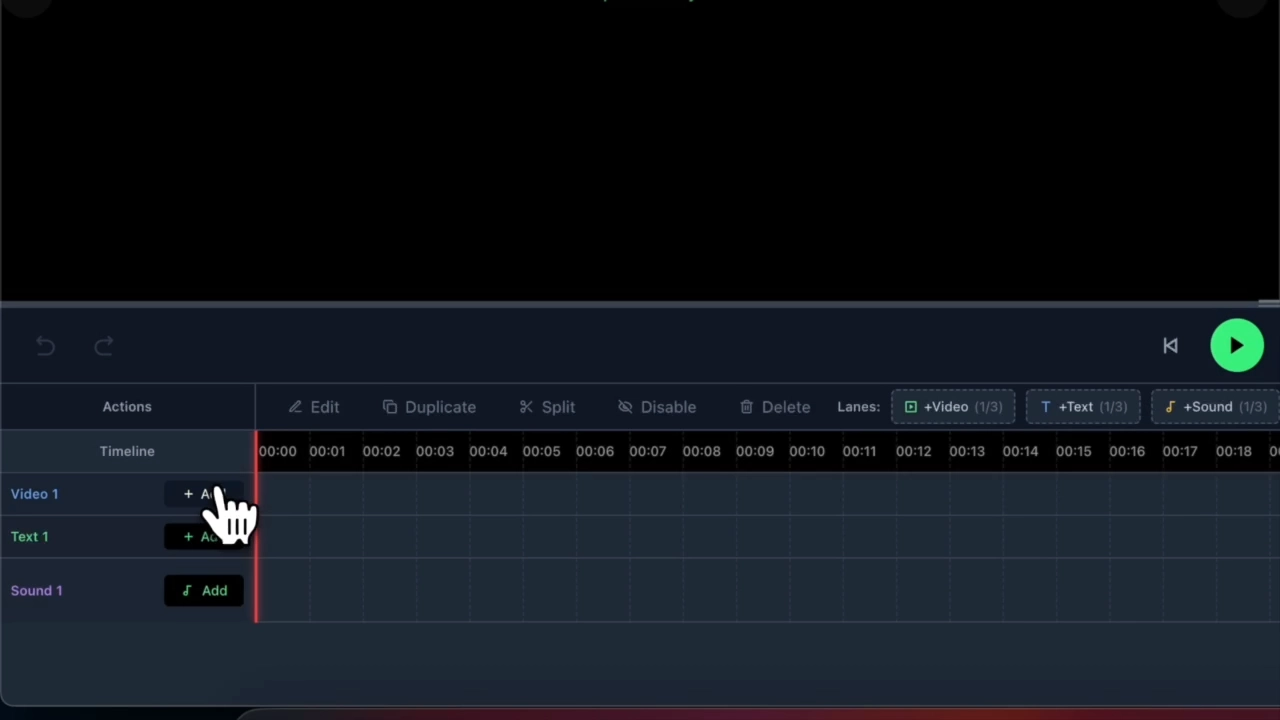
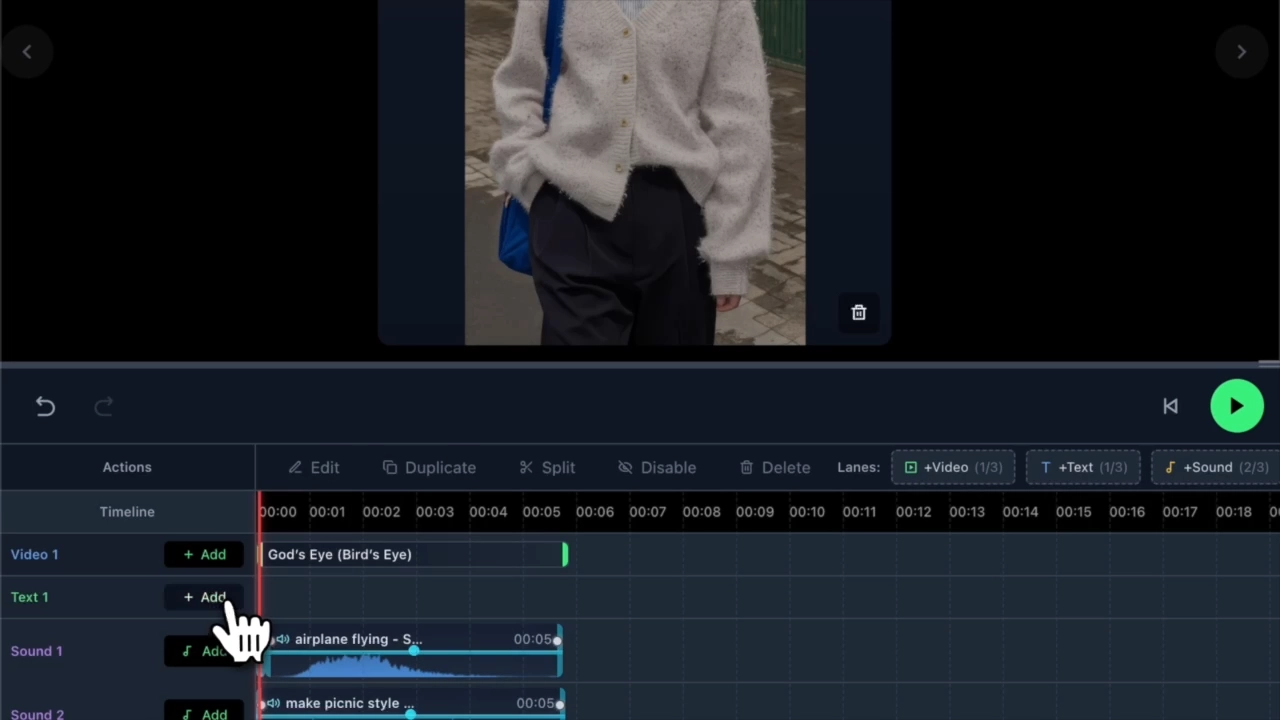
Complete everything on one screen—from music, text, and quality upscaling to a ready-to-upload state.
🎬 Tutorial Videos (6)
Check the tutorials at realsnap.ai → Tutorial.
01. Create a Fashion Video with AI
Just add the image you want. The higher the image quality, the more natural the generation will be.
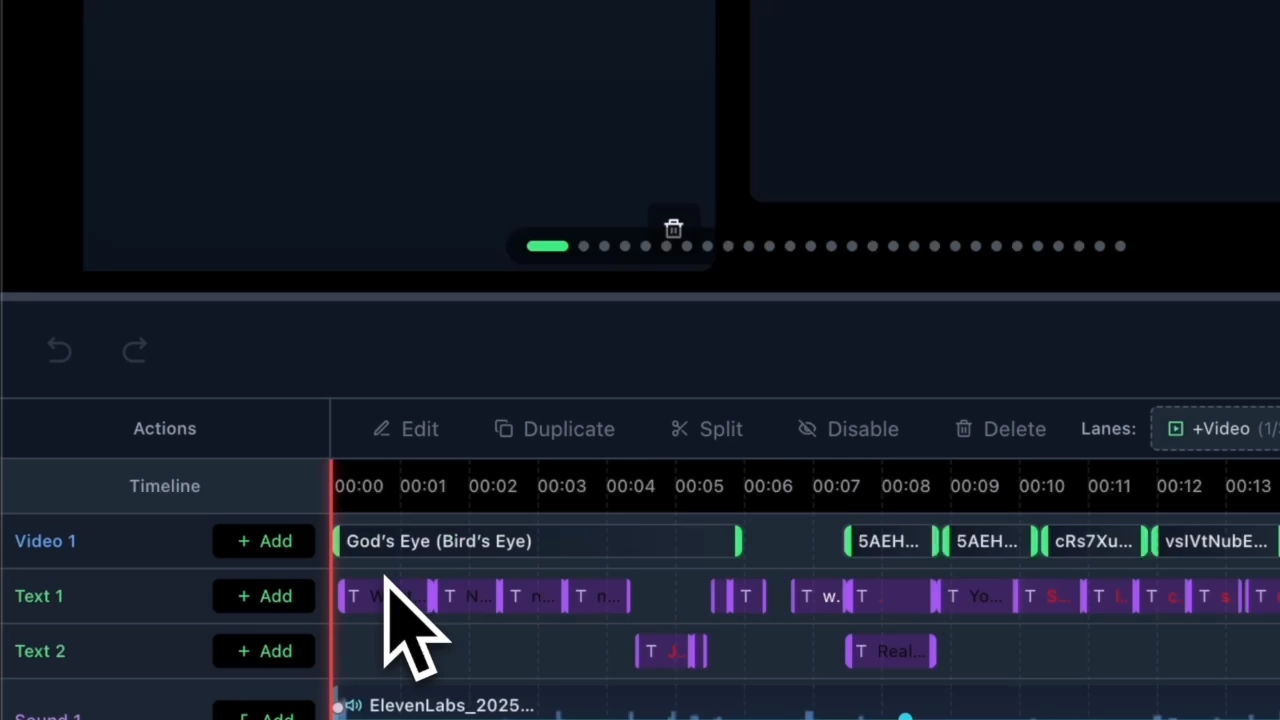
02. Use the Video Editing Tool
You can arrange the timeline and place items with drag-and-drop, just like commercial services such as CapCut.
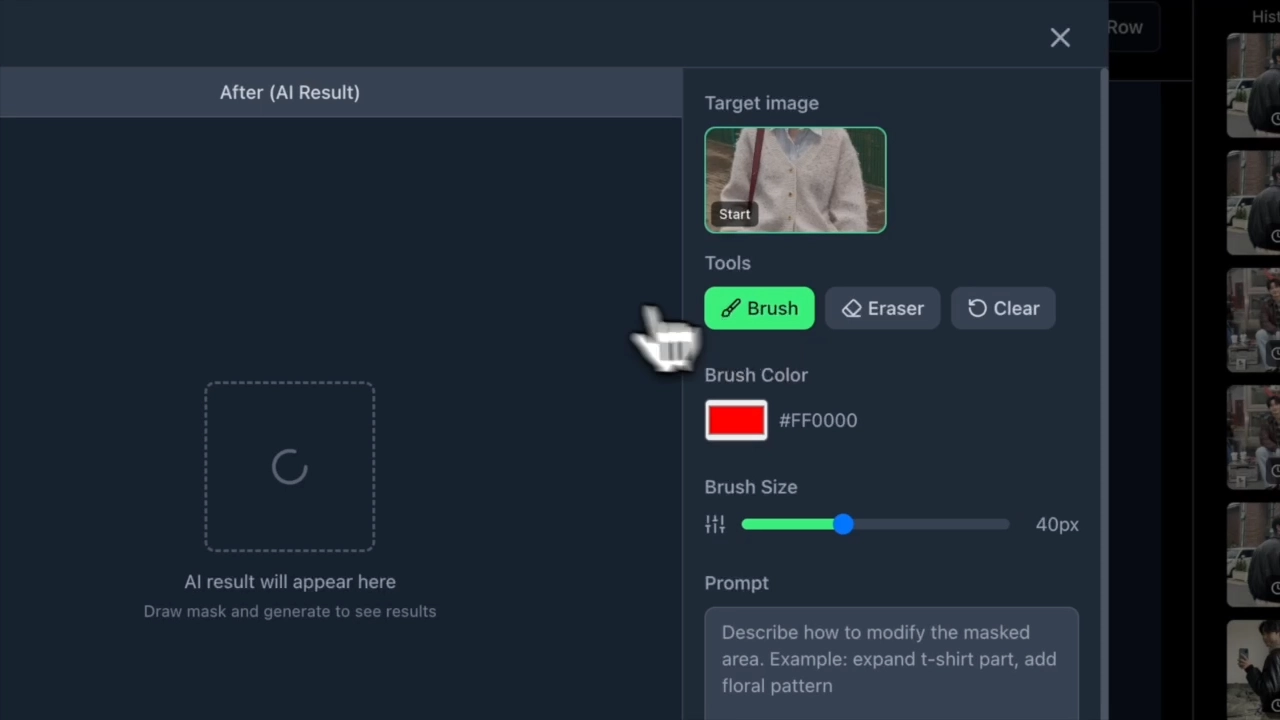
03. Replace Items with the Image Brush
Use the brush to make detailed edits.
04. Add Background Music to a Video
You can add sound effects directly or generate as many desired effects as you want.
05. Add Text to a Video
Captions and various caption styles are also available.
06. Upscale Video Quality
Upscale the generated video to improve it with better quality.
Menu Description
- Menu | Description
- Clip | Main workspace for uploading images, selecting effects, and generating AI videos
- Agent | Upload an existing video or Instagram URL, and AI automatically analyzes the scenes and regenerates it with a new concept
- Edit | Edit generated videos (Brush, Erase, Text, Sound, etc.)
- Library | A space to view and manage all videos you have generated so far at a glance
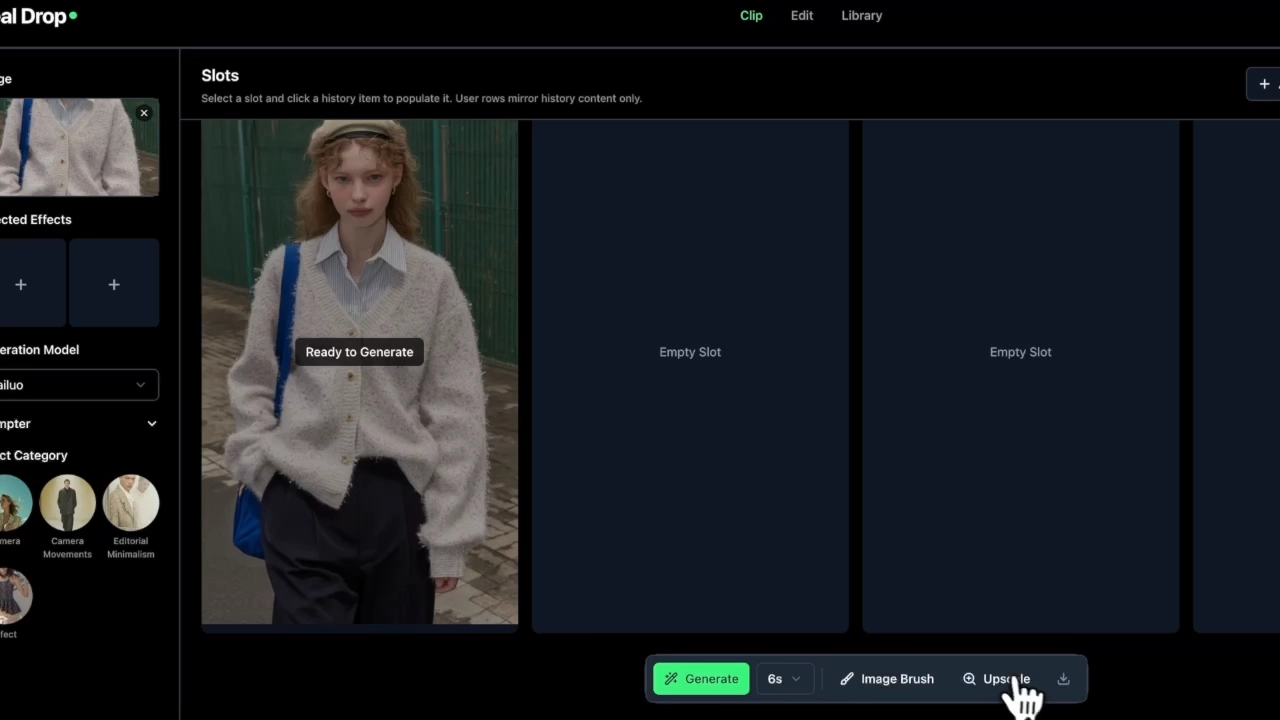
CLIP — Create AI Videos
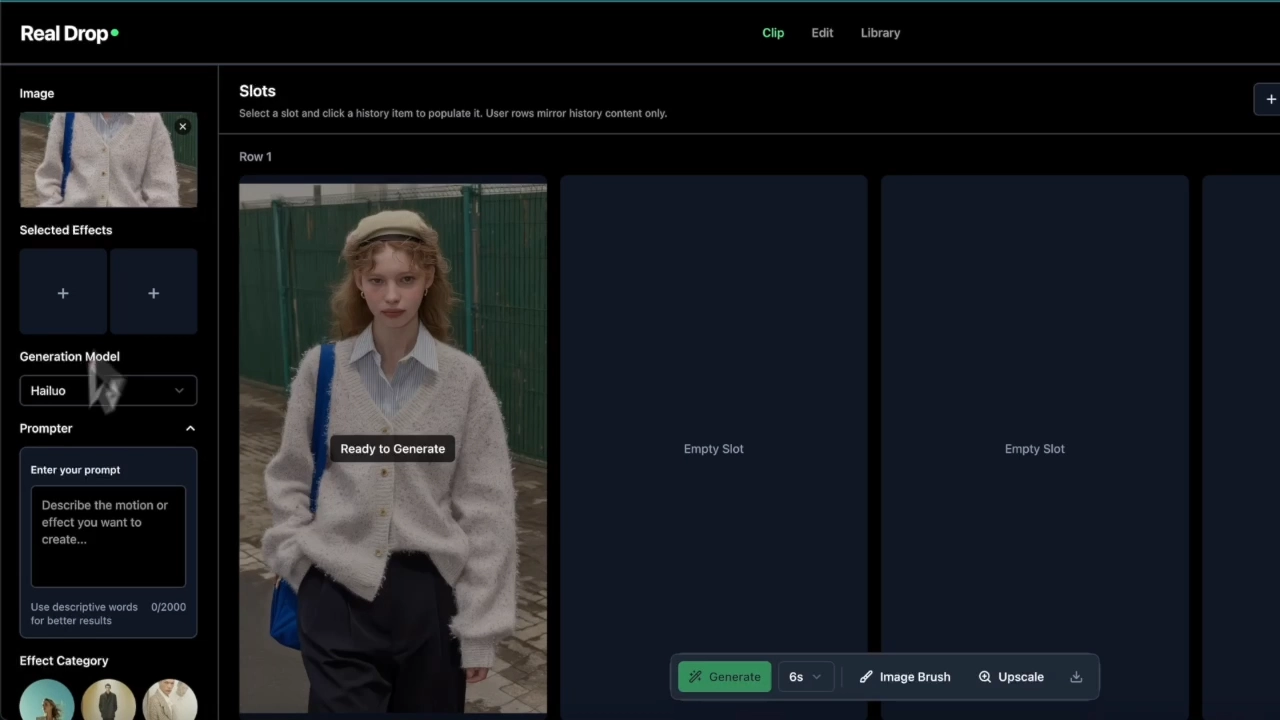
1. Upload an Image
In the left panel's Image area, click Upload image.
- AI analyzes the image and generates a video featuring the main subject.
- Lookbook photos, product photos, model photos, and more can all be used.
2. Select an Effect Category
In the left panel's Effect Category, select the effect you want.
- Camera : camera examples: zoom, pan, rotate
- Camera Movements : camera movements such as shake, zoom in/out, rotation, etc.
- Effect : environmental effects such as light, falling water droplets, wind, etc.
- Effect samples are shown in the preview circle icon.
- Selected Effects (+) You can apply or layer multiple effects at the same time.
3. Set Generation Model & Options
- Generation Model : Hailuo (default) — the model can be changed from the dropdown menu
- Prompter : Enter the desired scene directly as text
- Video Analysis Engine button to connect image analysis
- Use the bottom Add Slot Row button to add slot rows by topic.
4. Generate
Use the bottom Generate button to generate the video.
- Auto : Automatically select export mode
- 6s : Video length (4s / 6s available)
- PRO MODE : Enable advanced options
IMAGE BRUSH — Specify a Certain Area
Before generating, you can use the brush to specify a character or background in the desired area.
- Paint the area where you want to apply the effect with the brush.
- This is enabled only after uploading an image first.
UPSCALE — Improve Video Quality
With the generated video selected, click the Upscale button and AI will automatically improve the quality.
- We recommend applying this after finishing edits before final export.
- Consumes 1 credit.
AGENT — Automatically Regenerate Videos
📌 AI analyzes an existing video or Instagram Reel URL and creates a new video with a similar concept.
3-step flow:
- Source — Upload a video (MP4 / WebM / MOV, up to 19 MB) or enter an Instagram URL, then click Analyze Video
- Customize — Review the scene-by-scene elements extracted by AI and modify effects / camera / model
- Generate — Review the settings and generate the video
- Generate Image button can also be used to extract a specific frame from the source video as an image.
HISTORY — View Generation History
In the right History panel, you can view all videos generated so far at a glance and apply them directly to a Slot.
- If you click a History item after selecting a slot first, it will be applied automatically.