💡 RealEdit is a service that uses AI to batch process final photo edits that used to be done manually.
The following tasks are available.
- Turn images taken with a mobile phone into clean product shots
- Remove the background or refine it into a consistent background
- Batch-apply margins according to a guide for raw product photos that are not centered
✂️: https://editor.realsnap.ai/sign-in
Menu Overview
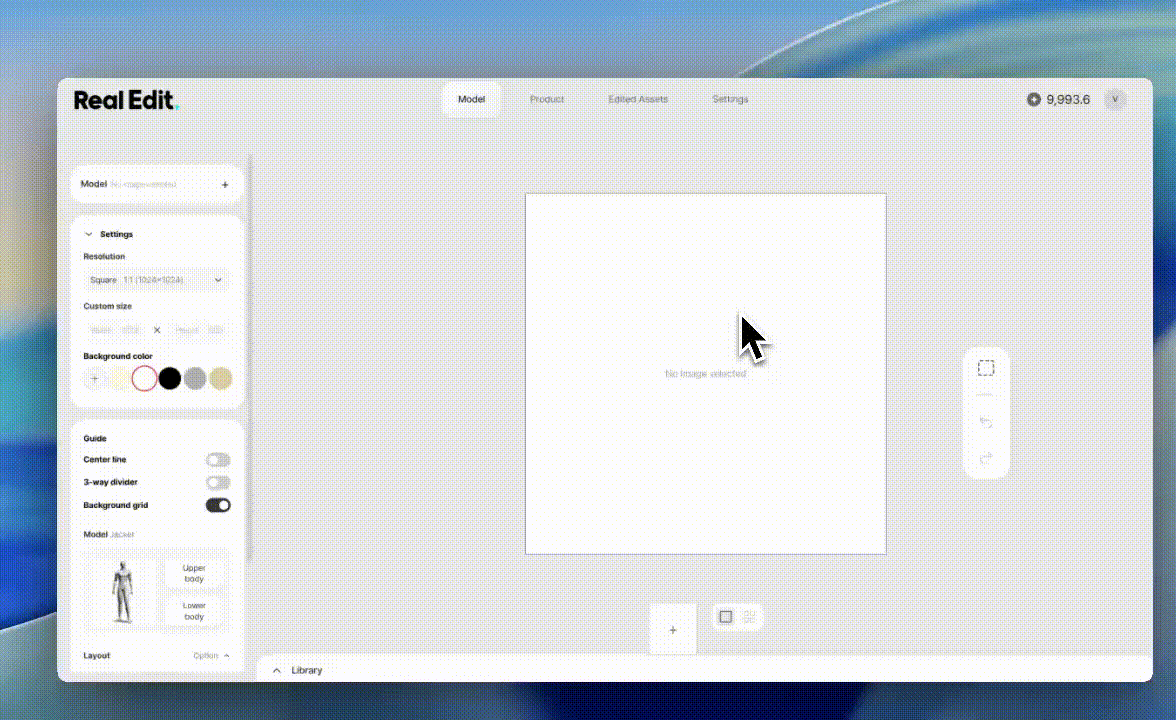
Model - Workspace for editing model shots
Product - Workspace for editing product shots
Edited Asset - View completed edited results all at once
Settings - A space to batch edit the AI editing guides by photo type (tops/bottoms/full body, etc.)
Creating Product Shots
- Upload photos taken with a mobile phone, and it will turn them into product shots.

Common to MODEL/PRODUCT
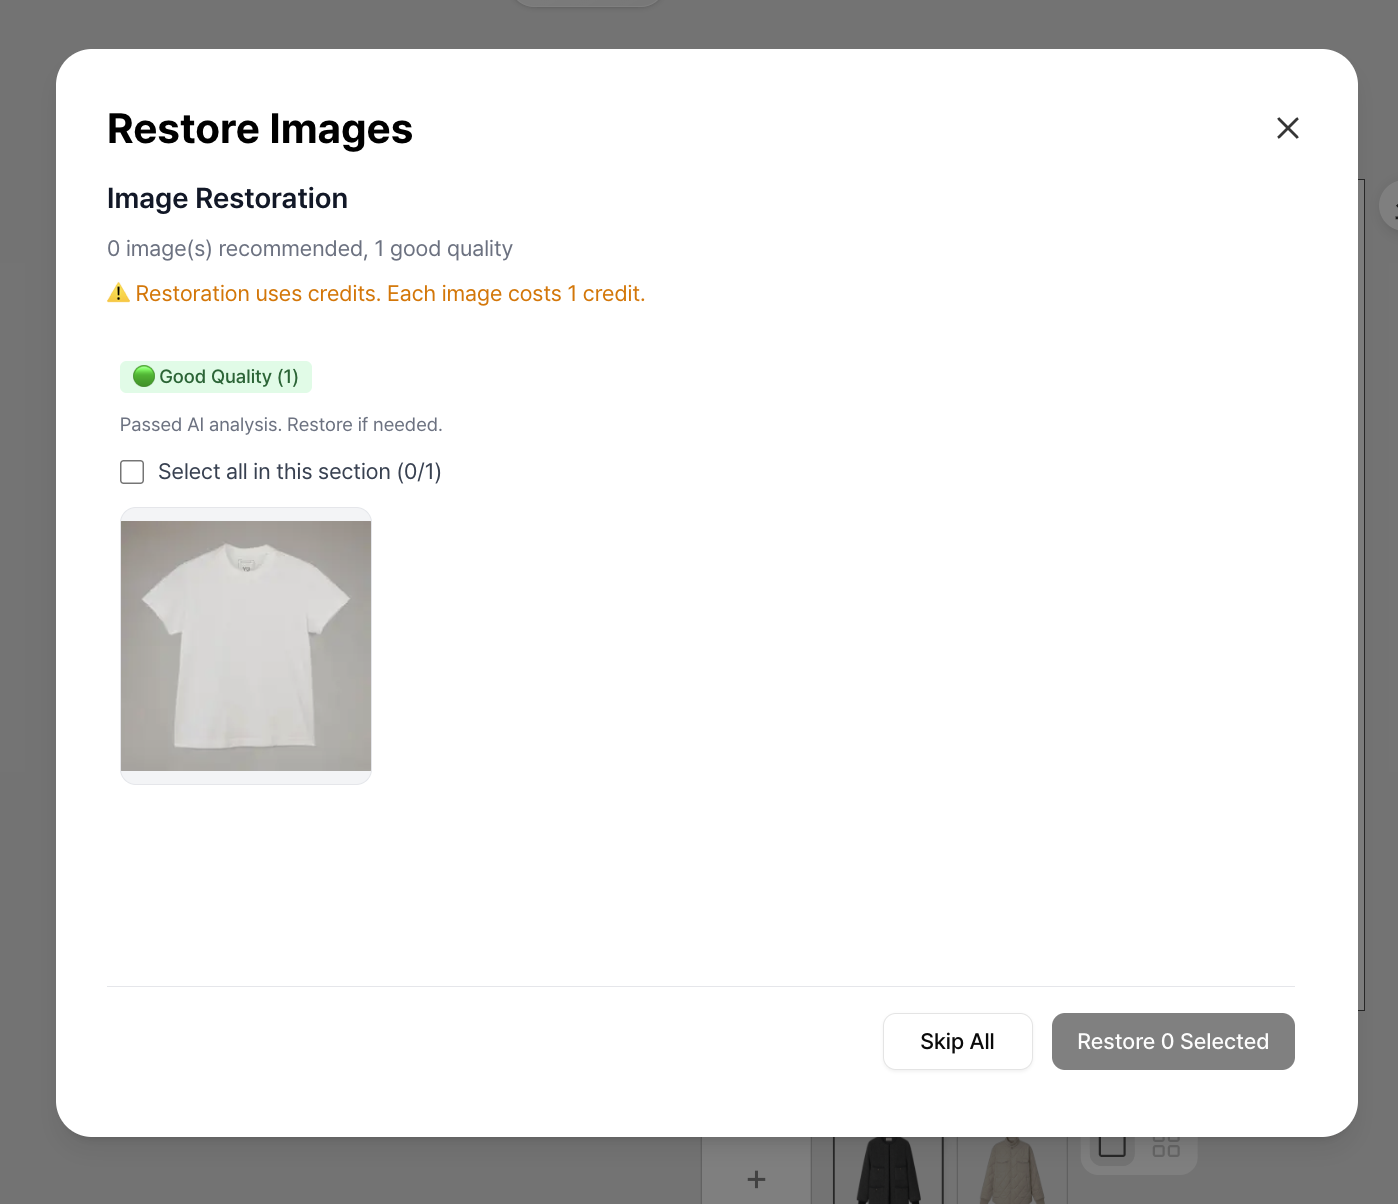
1. Upload Photos

- If restoration is needed, the AI will automatically ask whether you want to restore the image (e.g., when parts such as clothing sleeves are cut off).
- If you accept the suggestion, it will restore the image by referencing the product.
- If you do not want this, skip it.
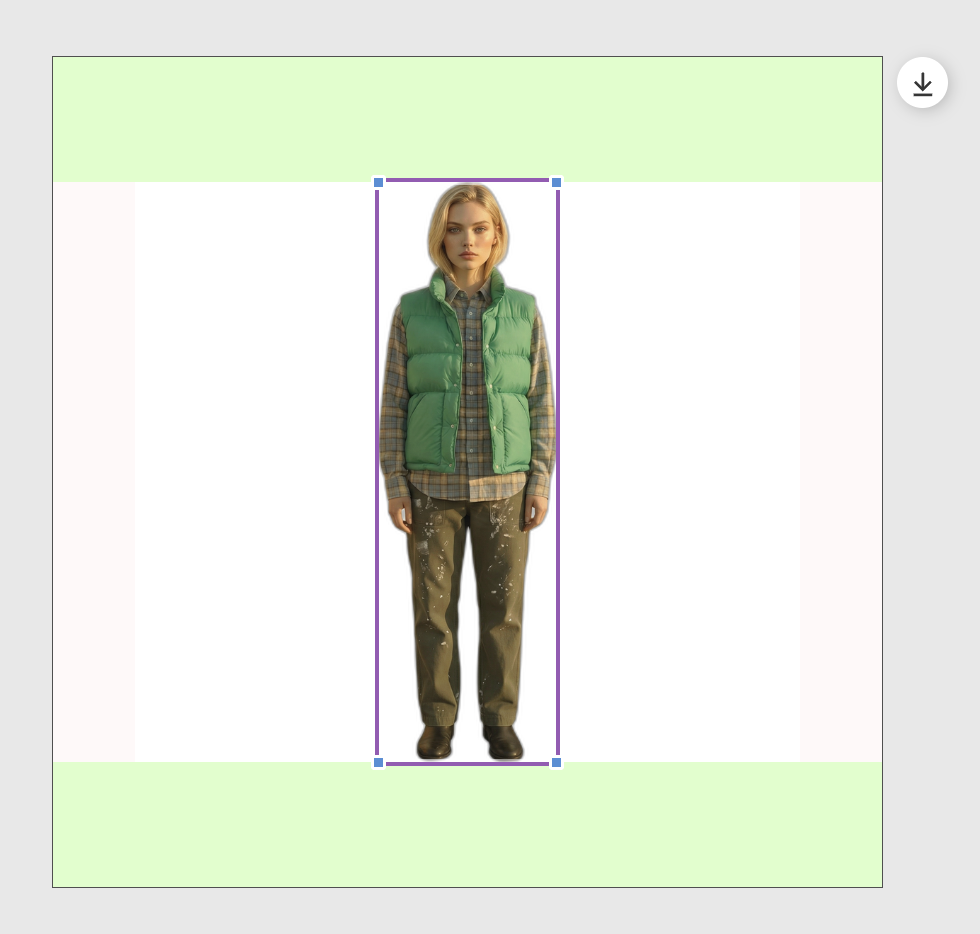
2. Automatically Apply Photo Guides
Once the photo upload is complete
- The product type is automatically classified.
- The background is removed in batch.
- Results are generated according to the margin guide preset for the selected size (1:1, 3:4, etc.).
- You can select a photo and directly enlarge or position it.
3. How to Use the Left Panel
- After selecting the desired photo, you can change the background.
- You can configure the grid settings needed for the task.
- For model shots, it automatically captures upper-body/lower-body crops. Press generate to create the image with that crop.
- You can apply grids separately for each photo.
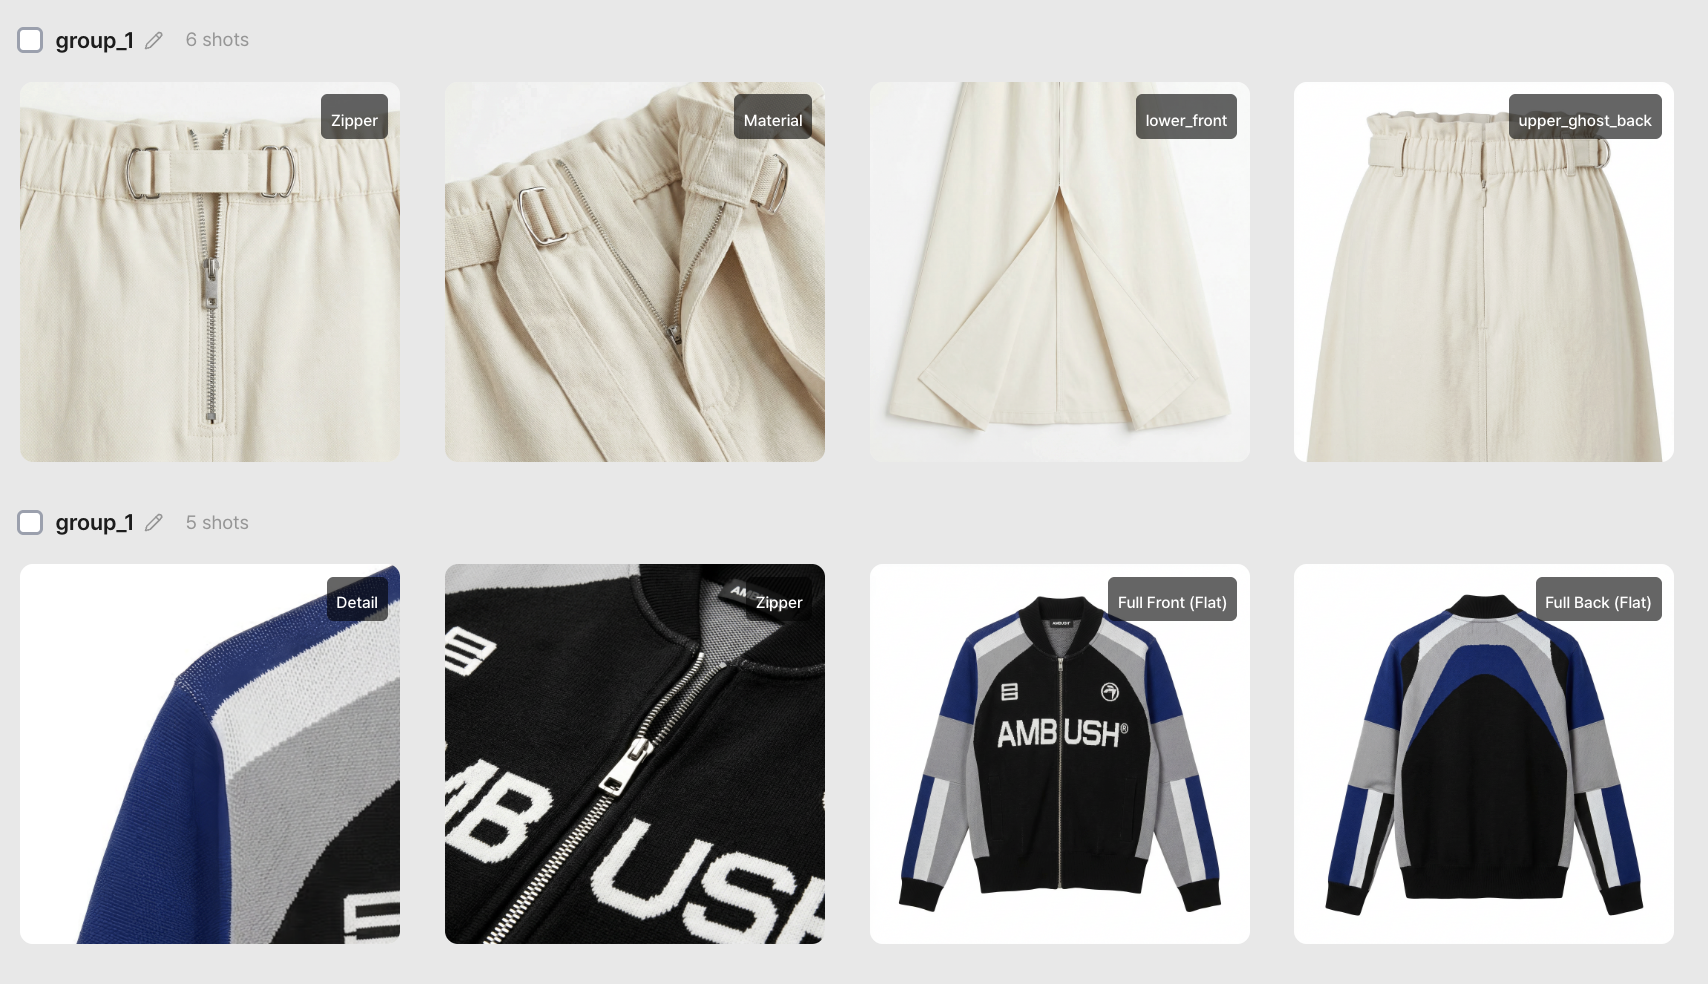
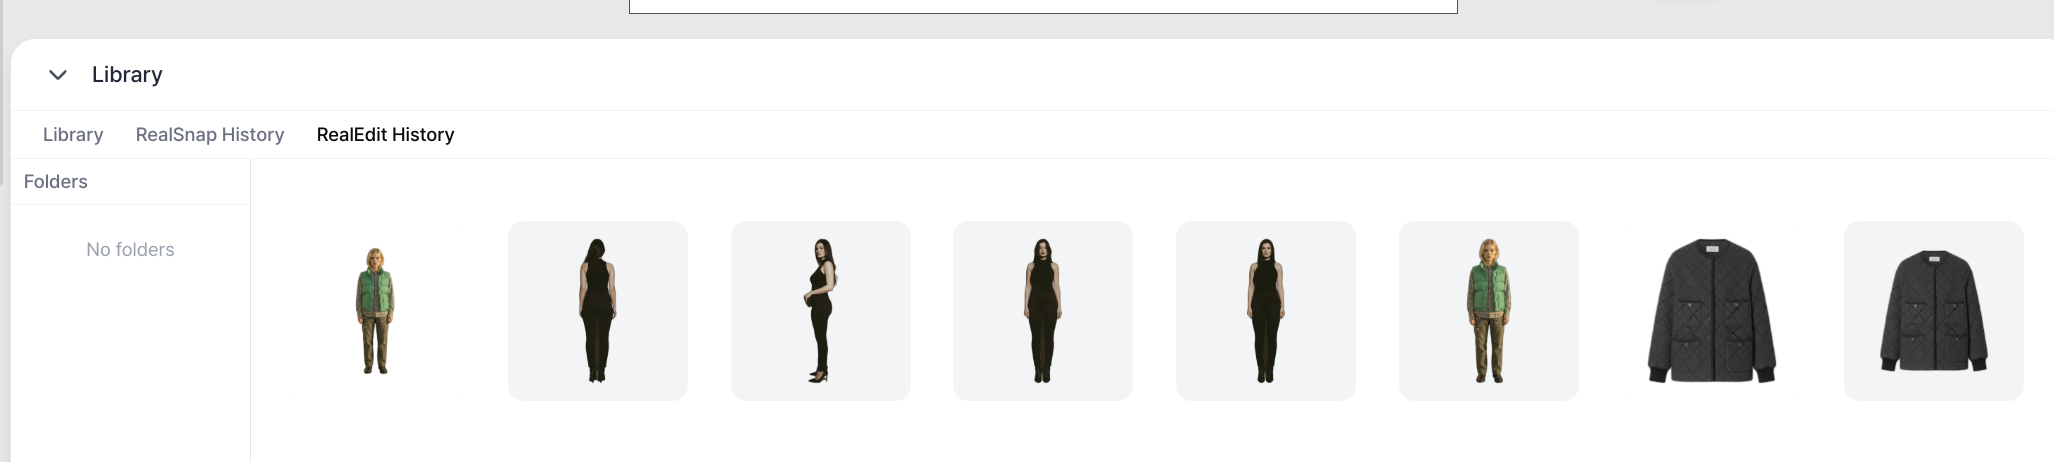
EDITED ASSET
- This is where you can view all completed photos at once.
- Batch selection and download are available.
- Product shots/model shots are automatically classified.
- You can also view, upload, or download results anytime from the Library at the bottom of the workspace.
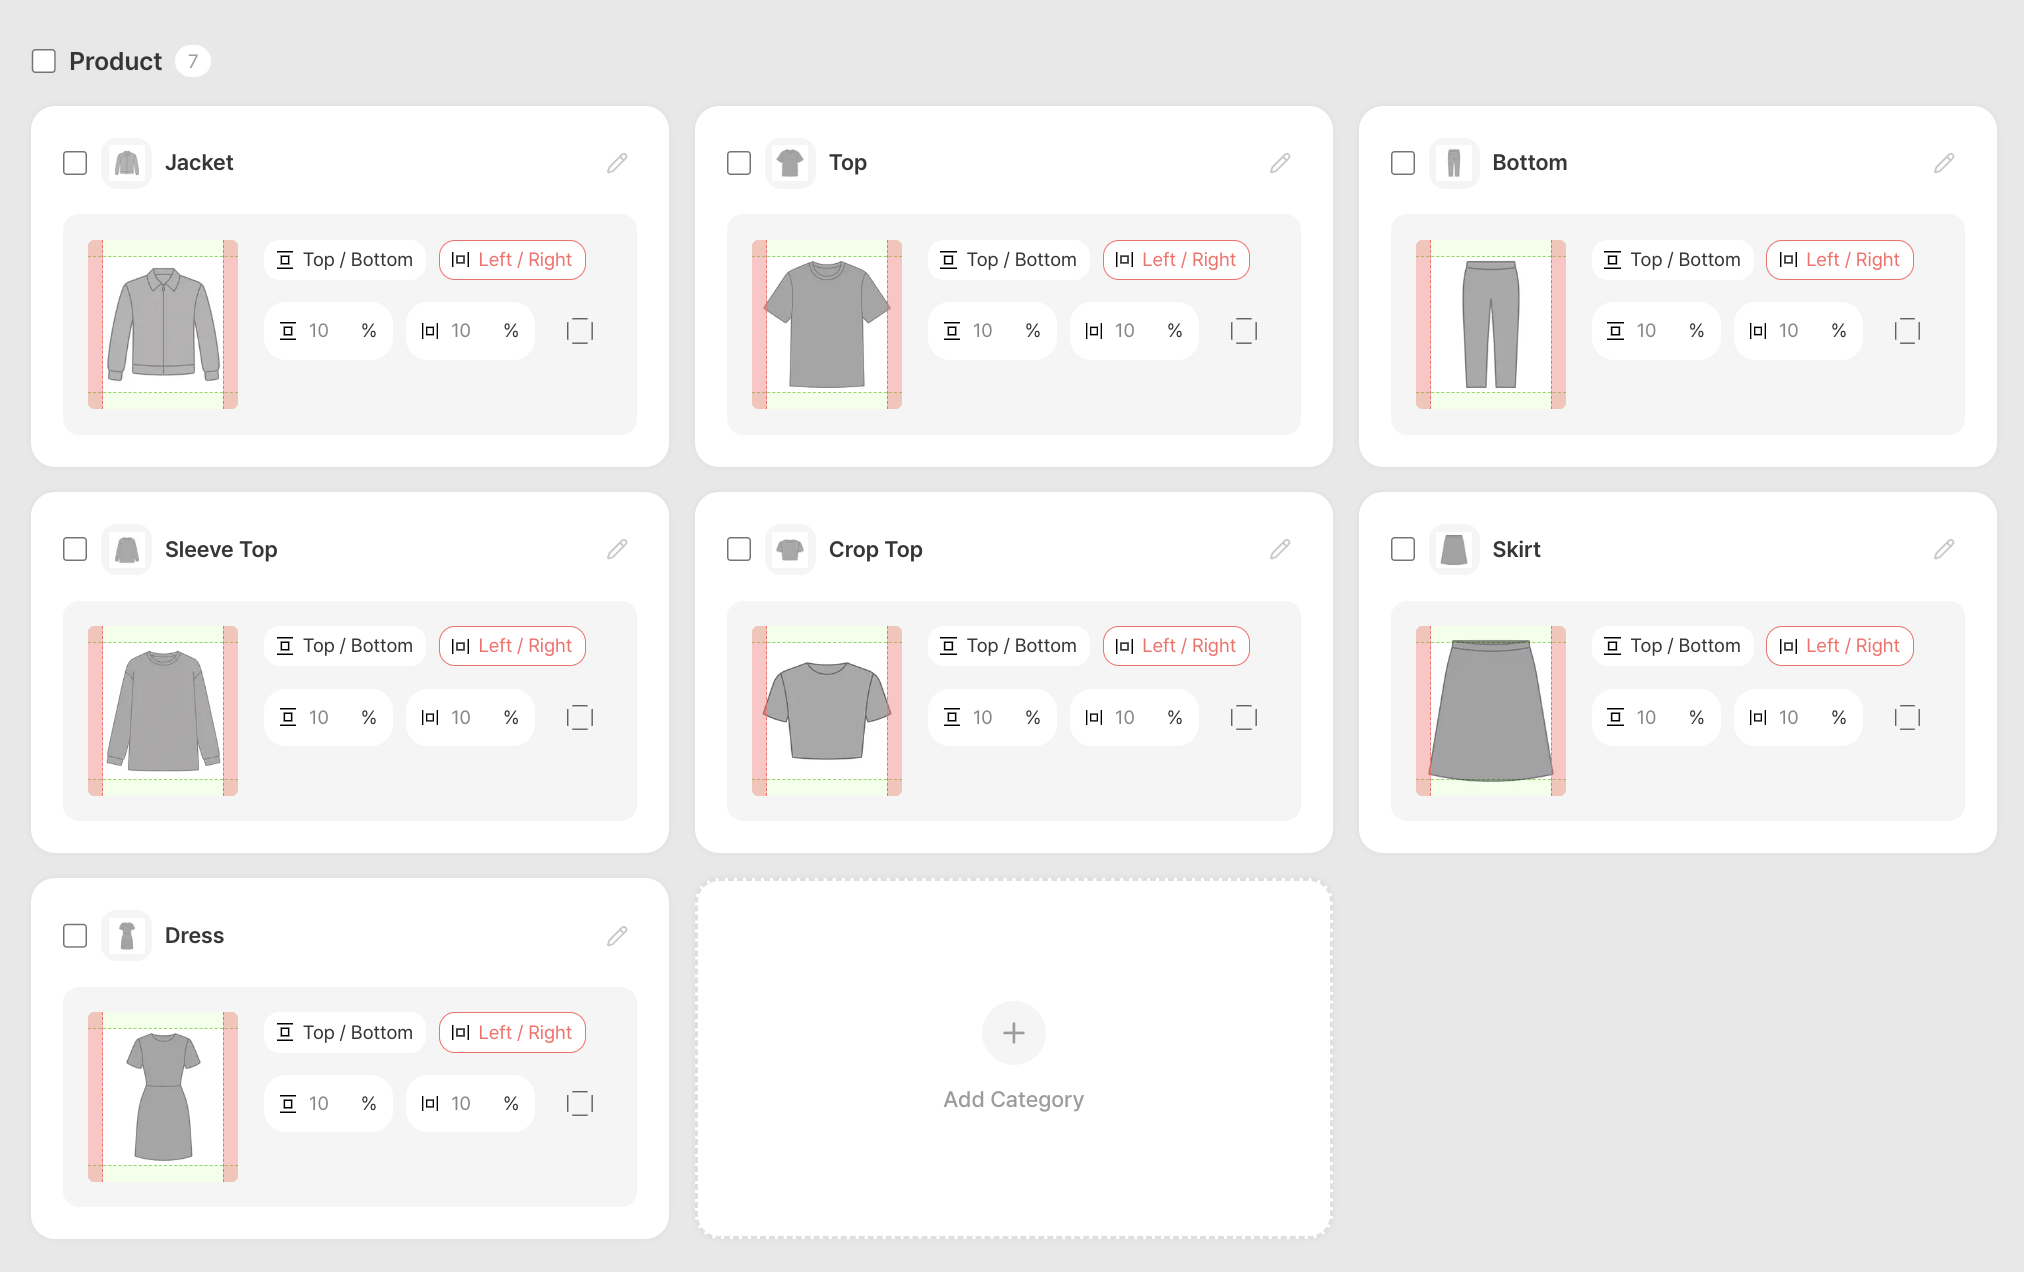
SETTINGS
- You can create guides for each product in the way you want. (You can also enter thumbnails manually.)
- By default, you can set margins as top/bottom and left/right pairs.
- If desired, you can set top/bottom separately and left/right separately.
- For default guides such as tops/bottoms/skirts, if you edit the margins, they will be applied automatically during the upload step.
- You can also apply your desired guide directly via Left Panel > Layout > Select Custom Guide > apply > generate.