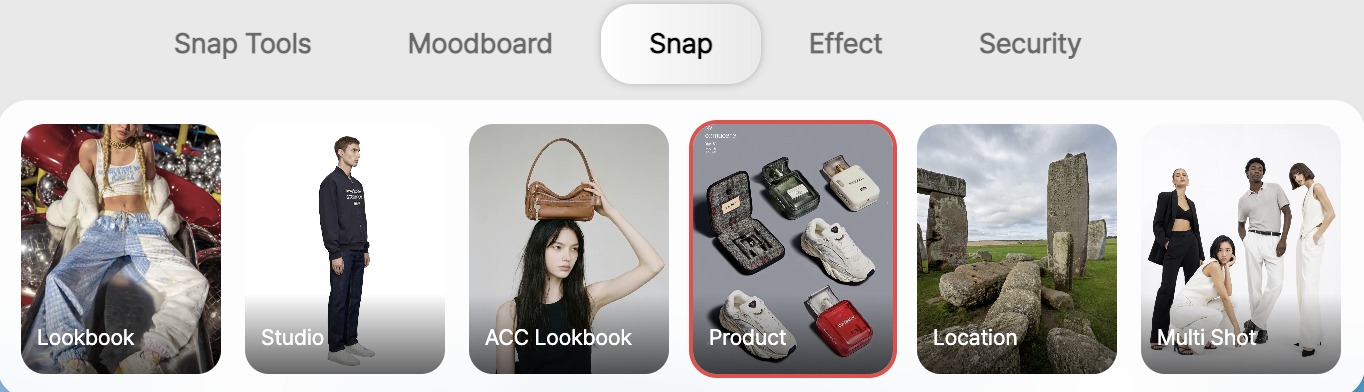
RealSnap Product Cut is a shooting method that creates images featuring only the product, without a model.
By adding a product photo and a reference image, you can create product editorial images that preserve the product’s shape while reflecting the mood, colors, and shoot style—ready to use on commerce detail pages or social media.
Sometimes you need images that show only the product
On commerce detail pages, you need not only model-worn shots but also images that clearly show the product itself.That’s because there are many cases where you need to accurately show the product’s shape and materials, such as bags, shoes, accessories, or clothing details.
But to make product photos look like editorial images, you need to set up the background, lighting, composition, and colors separately, which takes a lot of work.RealSnap Product Cut helps you create product-focused images for detail pages without a model, based on your product photo and reference image.
1. Add a product photo to preserve the product’s shape
In Product Cut, you can add the product photo that should appear as-is in the result image.The uploaded product is naturally placed within the editorial shot while keeping its shape.
This feature is especially useful for commerce images where the product’s shape matters.It’s great for images where actual product information needs to be clearly shown, such as a bag’s silhouette, a shoe’s shape, an accessory’s structure, or clothing details.
2. Set the style of your product editorial image with a mood reference
A mood reference is a reference image that sets the mood and composition standard for the finished product editorial image.You can choose from prepared presets, or use a photo you upload yourself or an image created in a moodboard.
For example, if you have a desired direction—such as a minimal studio product shot, a luxurious campaign mood, or a lifestyle editorial with natural light—it’s helpful to add a mood reference.You can communicate styles that are hard to explain in words through images, making it easier to align the result with your intended direction.
3. Choose how much to reflect the reference
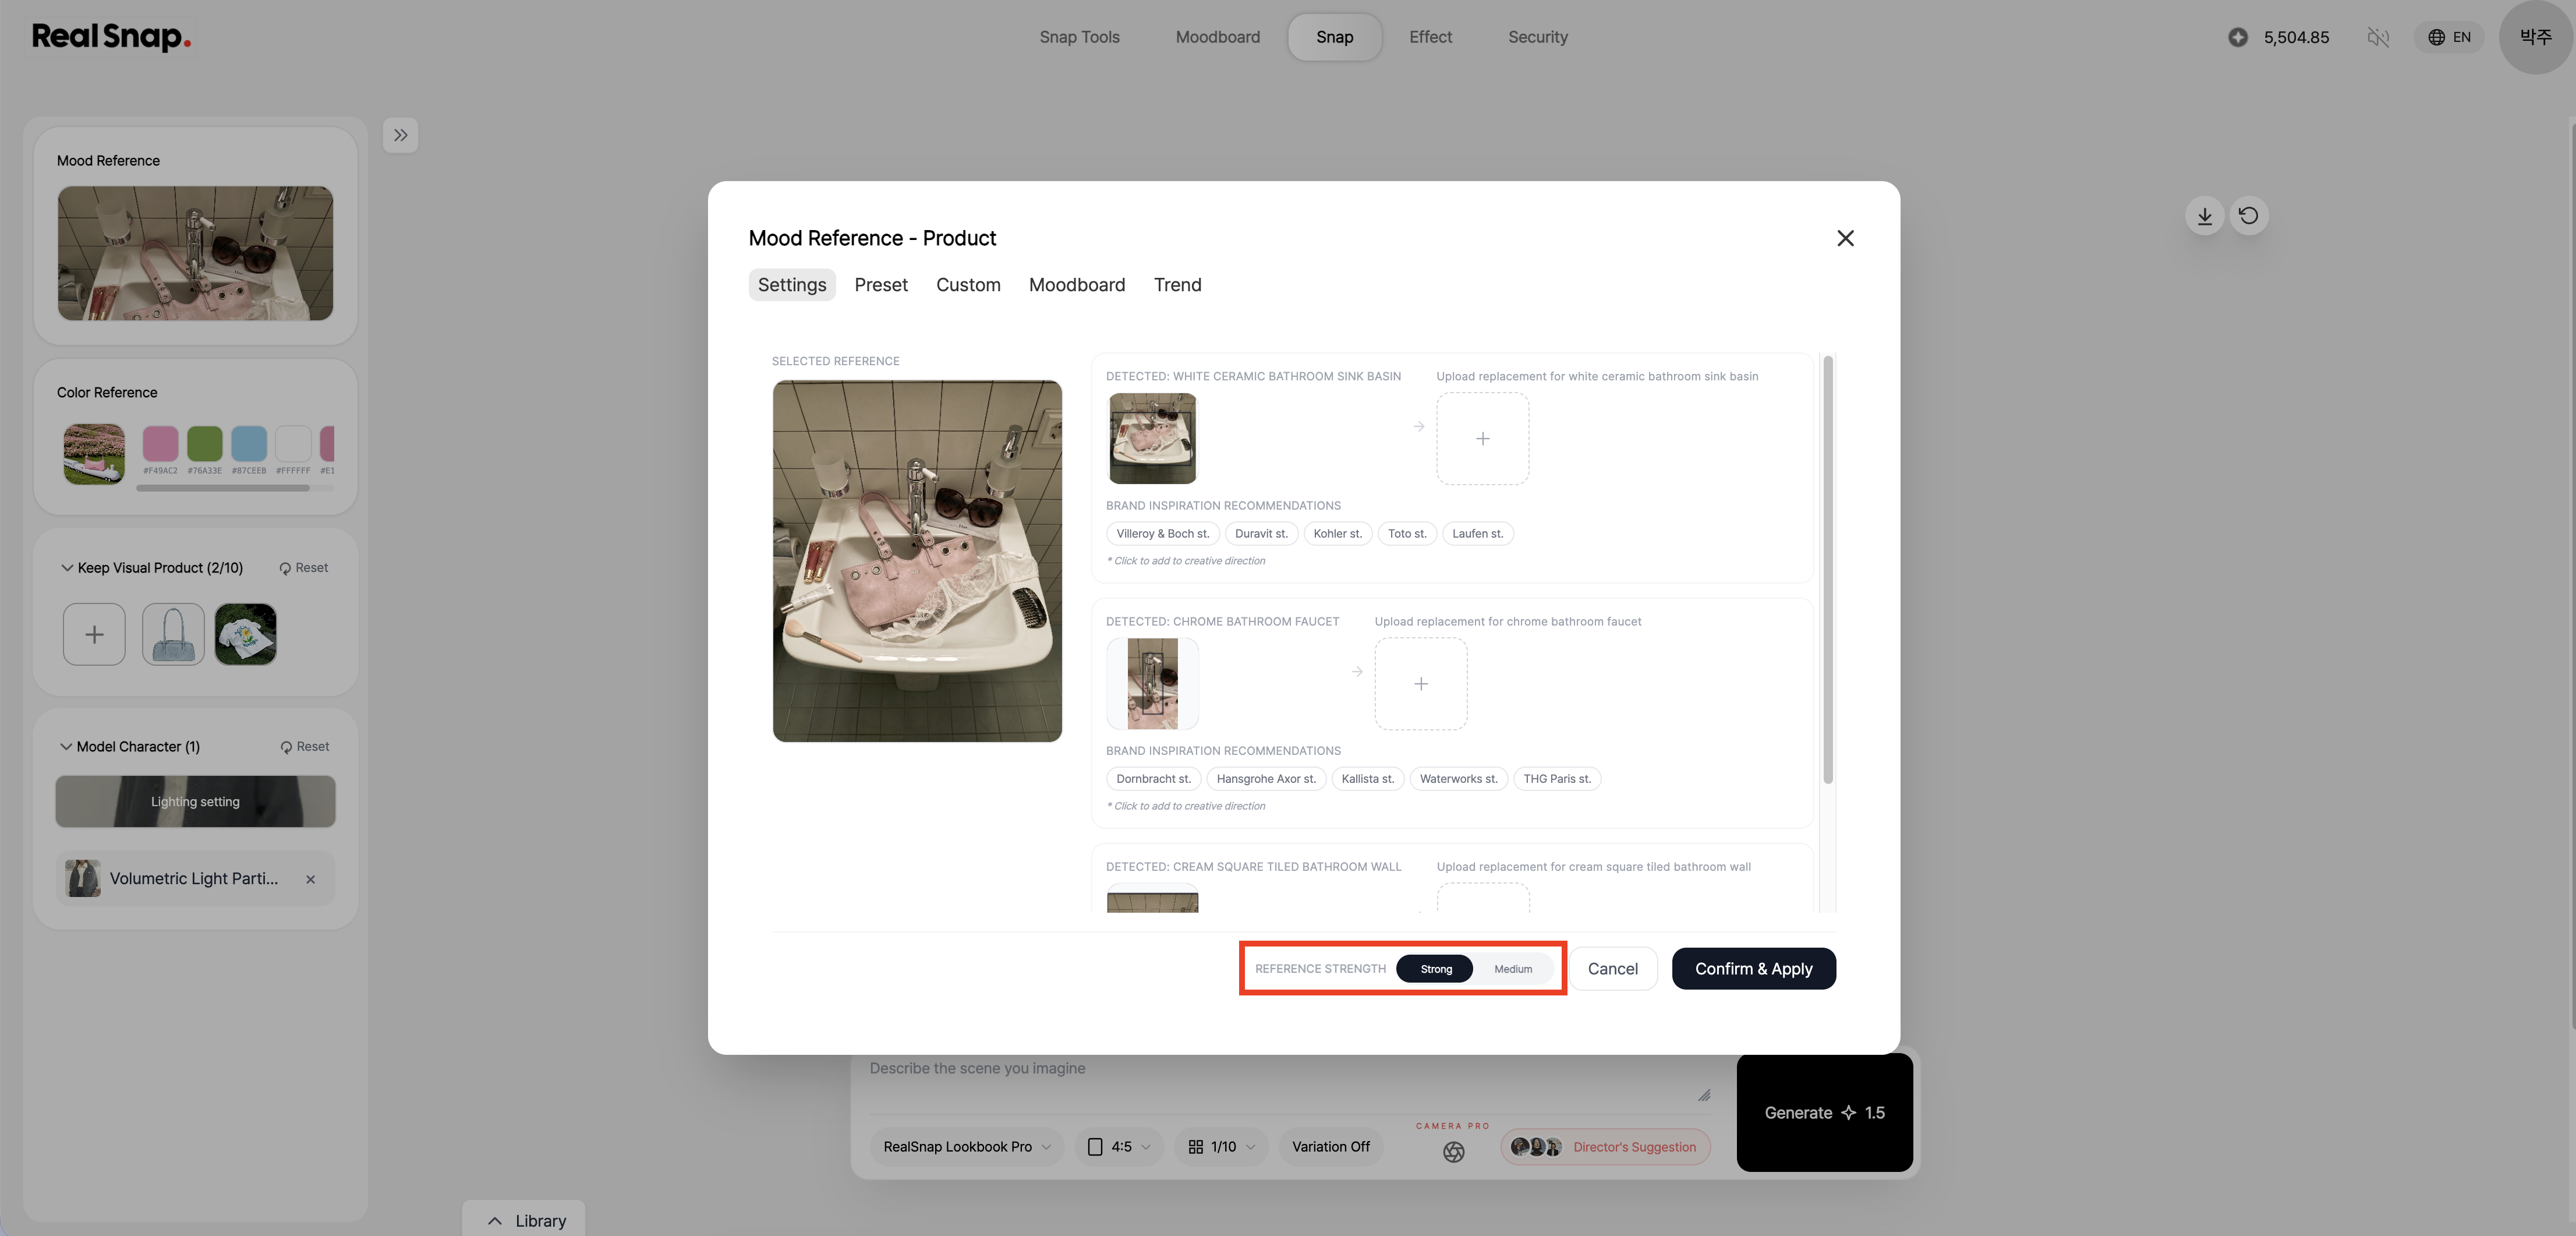
When adding a reference image, you can choose how strongly it should be referenced.You can follow the reference image closely, or have the AI use only the mood it analyzes from the image.
If you want to preserve the mood and composition of the original reference as much as possible, it’s best to use the default setting.On the other hand, if you want to bring in only the overall mood rather than the reference’s details, you can adjust the reference strength to create a more flexible result.
4. Replace elements in the reference to match your product
AI can detect elements such as props or logos within the reference image.You can upload your product image to replace that area, or choose matching brand style tags to apply.
For example, the reference image may include another brand’s product or props, but in the result image, your product may need to appear in that spot.In that case, instead of following the reference elements exactly, you can replace them to match your product and brand style when creating the product editorial image.
5. Set the colors of your product editorial image with a color reference
A color reference is a feature that lets you upload a photo you like and reference its key colors and mood.When you upload a photo, the representative colors and mood description can be automatically extracted and reflected in the result image.
For example, if you want a specific color feel—such as a warm beige tone, a strong red accent, or a calm gray mood—it’s helpful to use a color reference.It’s useful for matching the background, props, and overall tone of your product editorial image to your brand colors or seasonal mood.
6. Add the feel of a real product shoot with camera settings
In camera settings, you can choose camera settings such as lens and aperture.Using these settings can add the feel of a real shoot to the result image.
For example, you can adjust the desired shooting feel, such as a product editorial image with a softly blurred background, a sharp detail-page cut, or a studio product shot with vivid lighting.When it’s hard to explain the shooting feel with prompts alone, using camera settings together can improve the quality of the product image.
How to use
- Select Product Cut from the Snap menu.
- Upload the product photo to be reflected in the result image.
- Choose a mood reference to set the product editorial style you want.
- Adjust the reference method if needed.
- If there are elements in the reference you want to replace, change them with a product image or brand style tag.
- Add a color reference to match the colors and mood you want.
- Choose camera settings such as lens and aperture.
- After checking the prompt and settings, click Generate to see the result.
💡 Things to keep in mind
If you use the result image for sales, make sure it does not differ significantly from the actual product’s shape, color, or material texture.In particular, it’s a good idea to zoom in and review elements that are important for product identification, such as bags, shoes, accessories, logos, and patterns.
When using reference images, it’s best to use images you have permission to use or images that can be used for reference purposes.Make sure specific brand logos, people, or copyrighted images are not overly reflected in the result.
Color references and camera settings can affect the result image’s colors, focus, and background expression.If you use it on a detail page, be sure to check that there is no difference from the actual product color.
Conclusion
RealSnap Product Cut is a great shooting method to use when you want to create commerce product editorial images featuring only the product without a model.You can add a product photo to preserve the product’s shape, and use mood and color references to match the style and colors you want.
If you need a main image for a detail page, product option images, SNS product shots, or product editorial images for a brand campaign, try creating product-focused images with Product Cut first.