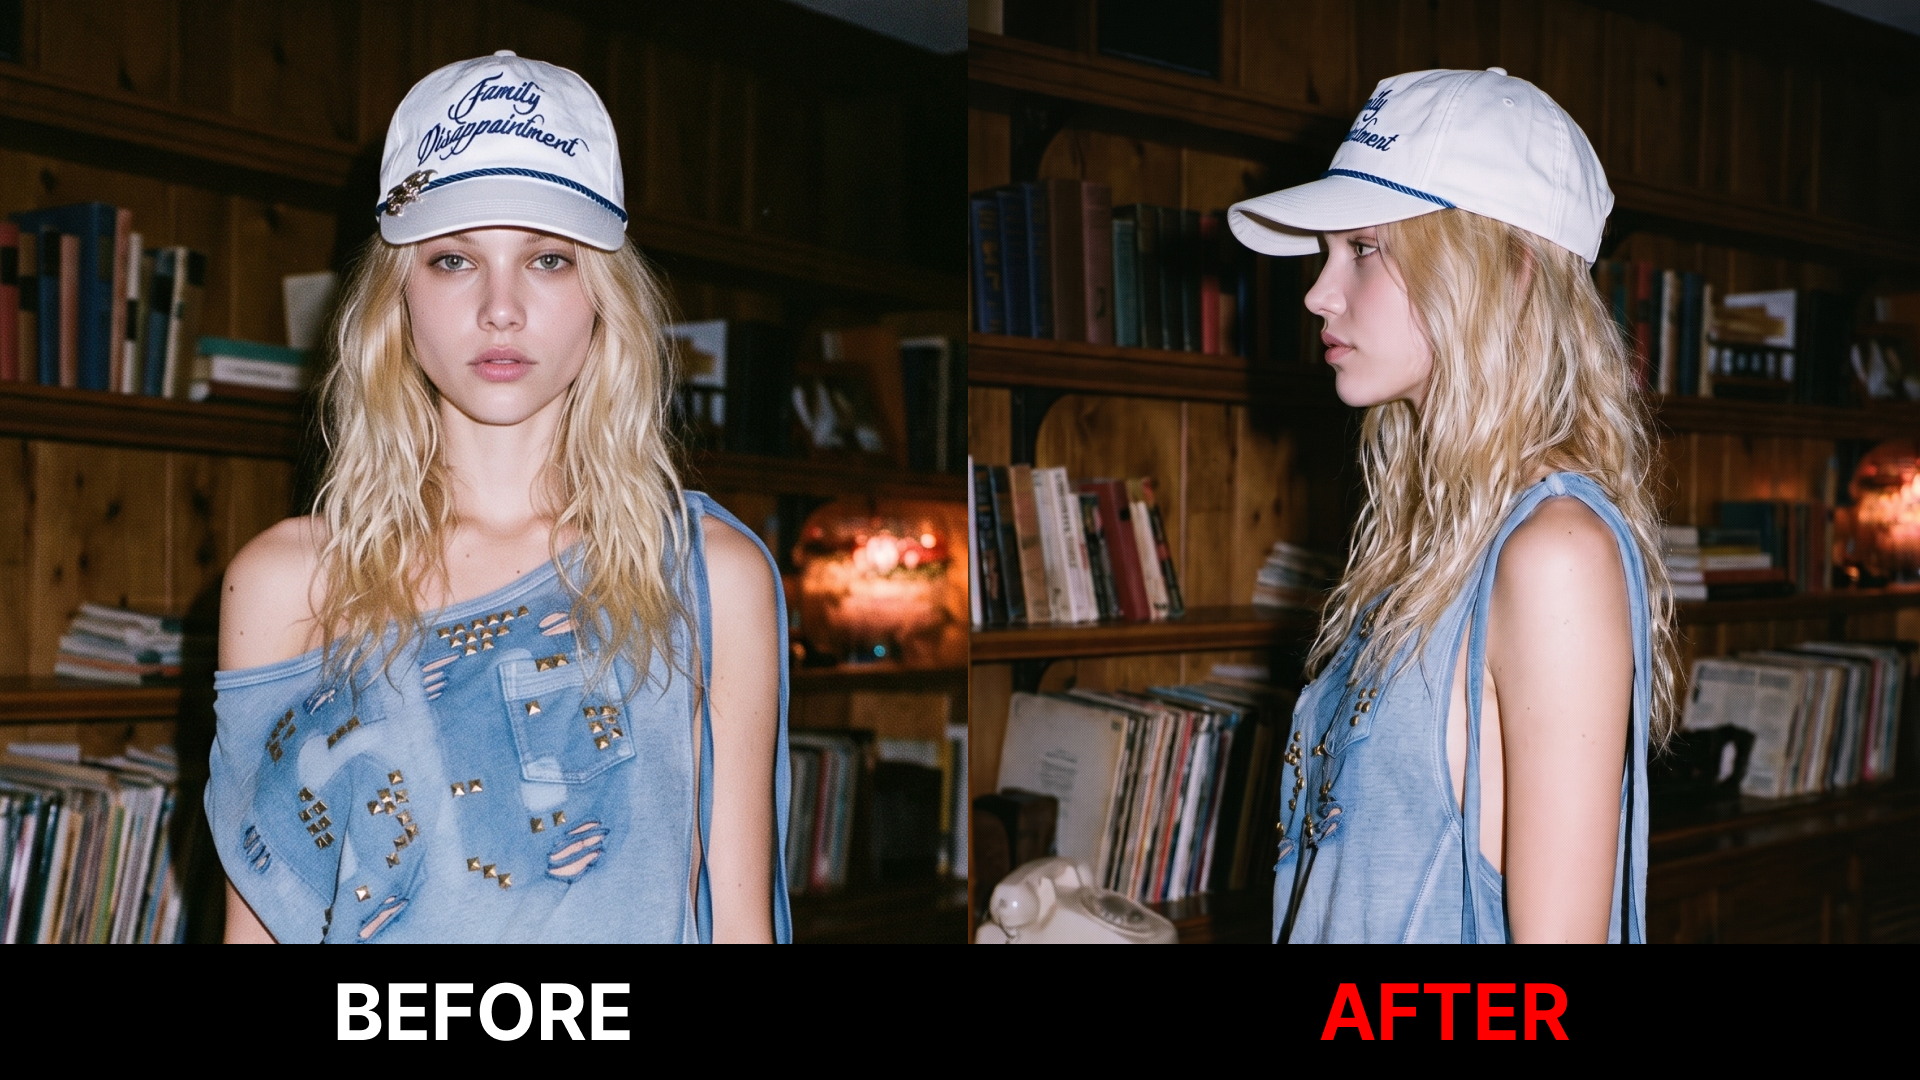
Can I recreate the same outfit by changing only the camera angle?
SNAP|Updated Aug 3, 2026
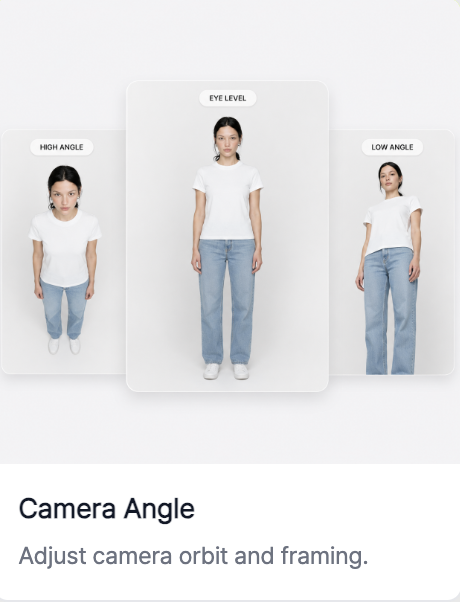
RealSnap Camera Angle is a feature that lets you adjust the shooting viewpoint of AI model shots in 2D or 3D.
After setting the front, side, back, top/bottom viewpoint, or close-up level and generating the image, you can make the same outfit look as if it was photographed from a different angle.
Sometimes you like the outfit, but the angle it’s shown from feels lacking
When you create an AI model shot, you may like the outfit, model, and mood, but feel that the camera angle isn’t quite right.For example, the front shot may look good, but you may need a side silhouette, need to show back details, or want to show the face or fabric more closely.
In these cases, recreating the image from scratch can change even the outfit and mood that came out well.RealSnap’s Camera Angle feature helps you recreate the same model shot with a different composition by setting the viewpoint and zoom you want.
1. You can upload a reference image with your desired composition in the Reference tab
The Camera Angle feature includes a Reference tab, where you can upload a reference image that is similar to the shooting composition you want.
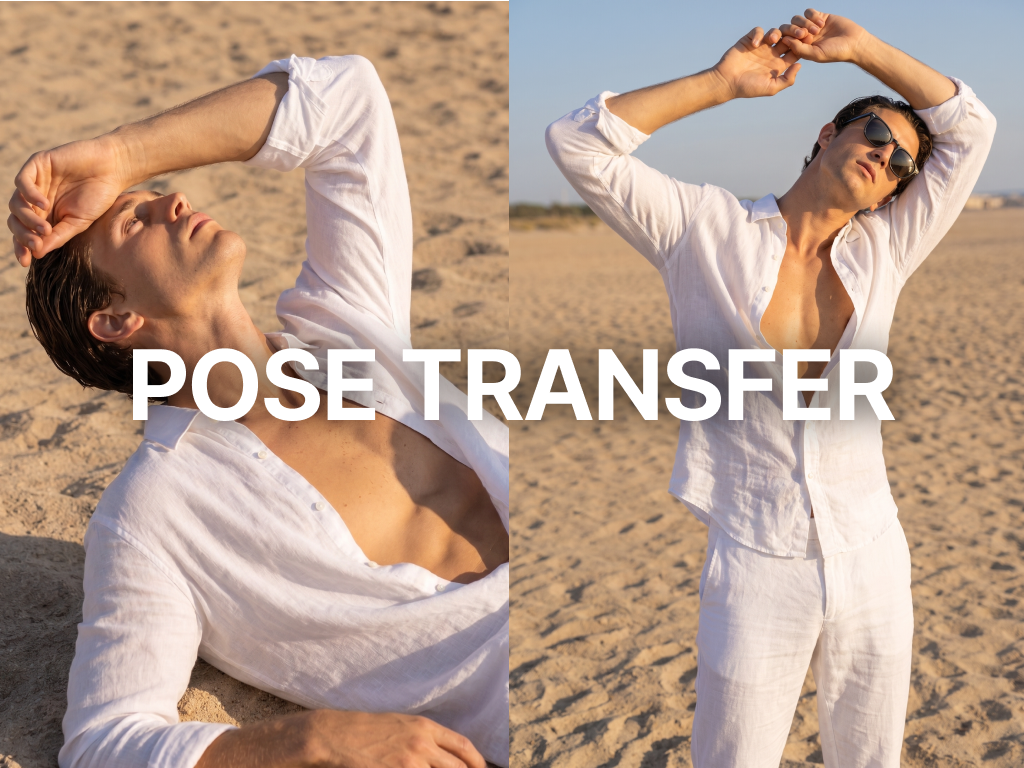
For example, if you have a reference image with the composition you want, such as a high angle, low angle, front full-body shot, three-quarter side view, or upper-body close-up, you can upload it to the Reference tab and work based on that composition.
With this feature, you can communicate camera viewpoints that are hard to explain in words through an image, making it easier to create results closer to the composition you want.
The composition uploaded to the Reference tab doesn’t have to be used only once; you can save it with the Save as preset feature.
You can recall and reuse saved compositions in future work, which is useful when you want to standardize multiple products or outfits with the same shooting criteria.
2. You can also adjust the viewpoint directly with 2D Orbit and 3D Camera
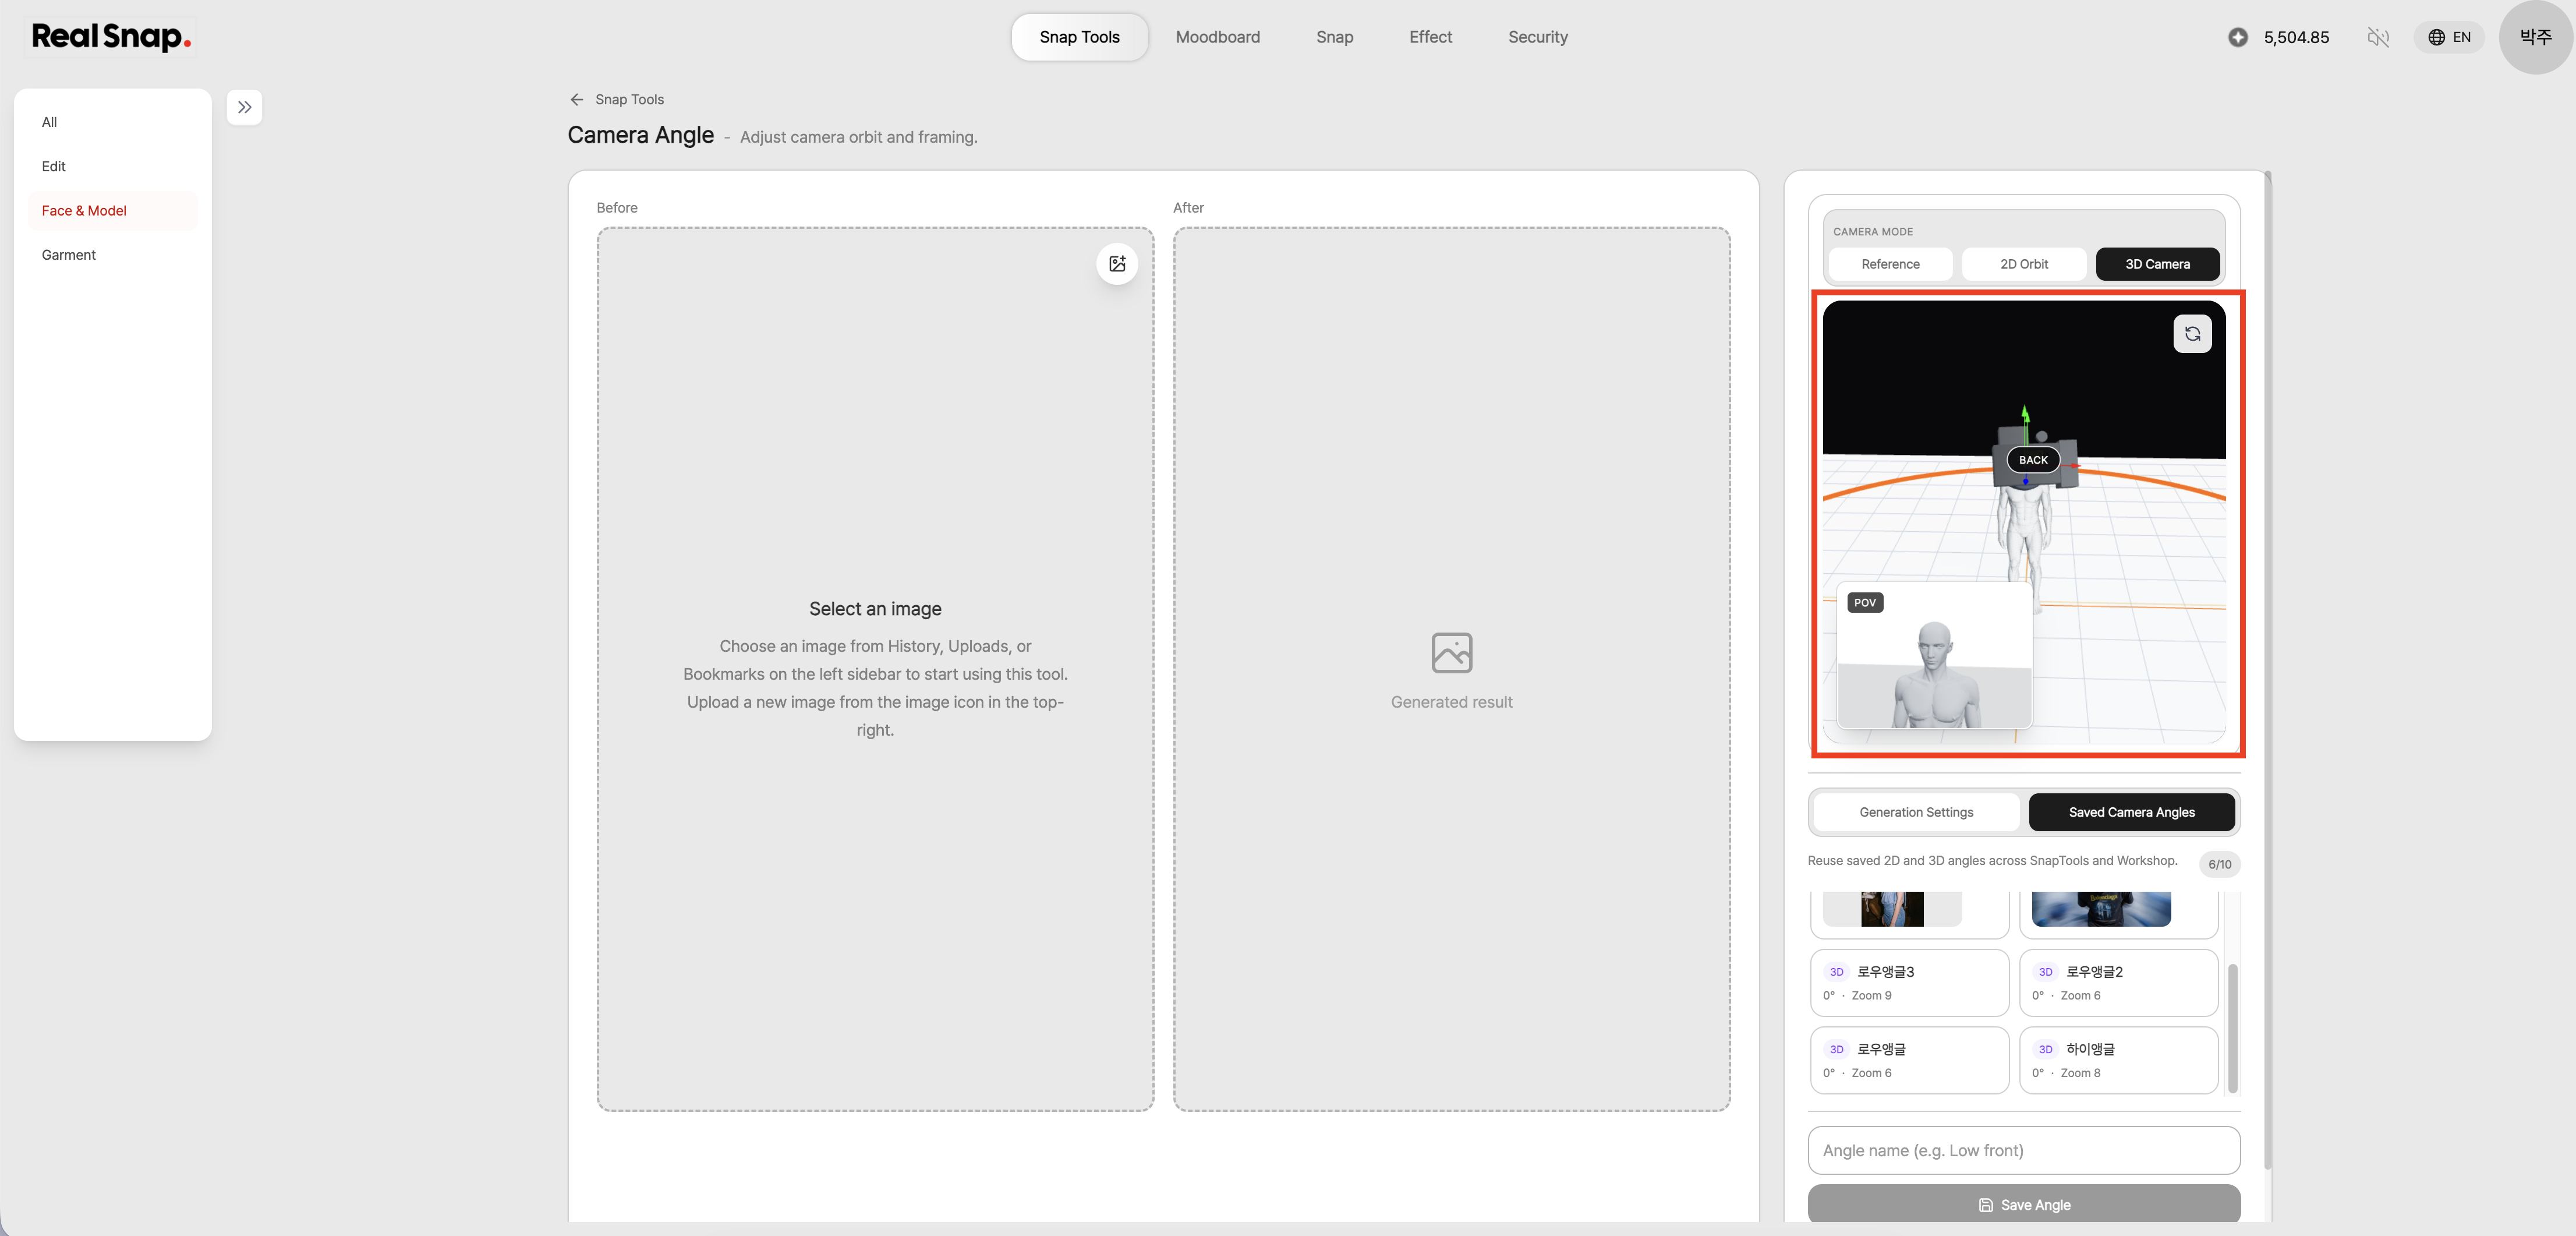
In addition to using references, the Camera Angle feature lets you adjust the composition directly with 2D Orbit and 3D Camera modes.
2D Orbit is great for quickly choosing basic directions such as Front, Right, Back, and Left.It can be used intuitively when creating basic shots such as front, side, and back views.
3D Camera is a mode that lets you move the camera three-dimensionally and fine-tune the viewpoint in more detail.It’s useful when you want to create more editorial-style angles, such as a slightly top-down viewpoint or a composition looking up from a lower position.
By adjusting the viewpoint and zoom together like this, you can create a variety of shot compositions tailored to how you want to show the product, even with the same outfit.
Since product detail pages often need images at various distances, such as full-body, side, back, and detail shots, using camera modes together with zoom can help you compose images more efficiently.
3. You can adjust zoom to create anything from full-body shots to close-ups
In Camera Angle, you can adjust not only the direction but also the Zoom value.
Lowering the zoom lets you create shots that clearly show the full body or overall outfit, while increasing the zoom lets you create close-up shots focused on the upper body, face, or details.
So even with the same outfit, you can create multiple versions suited to different uses, such as full-body shots, half-body shots, and detail shots.
Since product detail pages often need close-up shots that clearly show the fabric, details, and fit along with shots of the entire product, using the zoom feature as well makes the process more efficient.
4. You can recall and apply saved camera angles
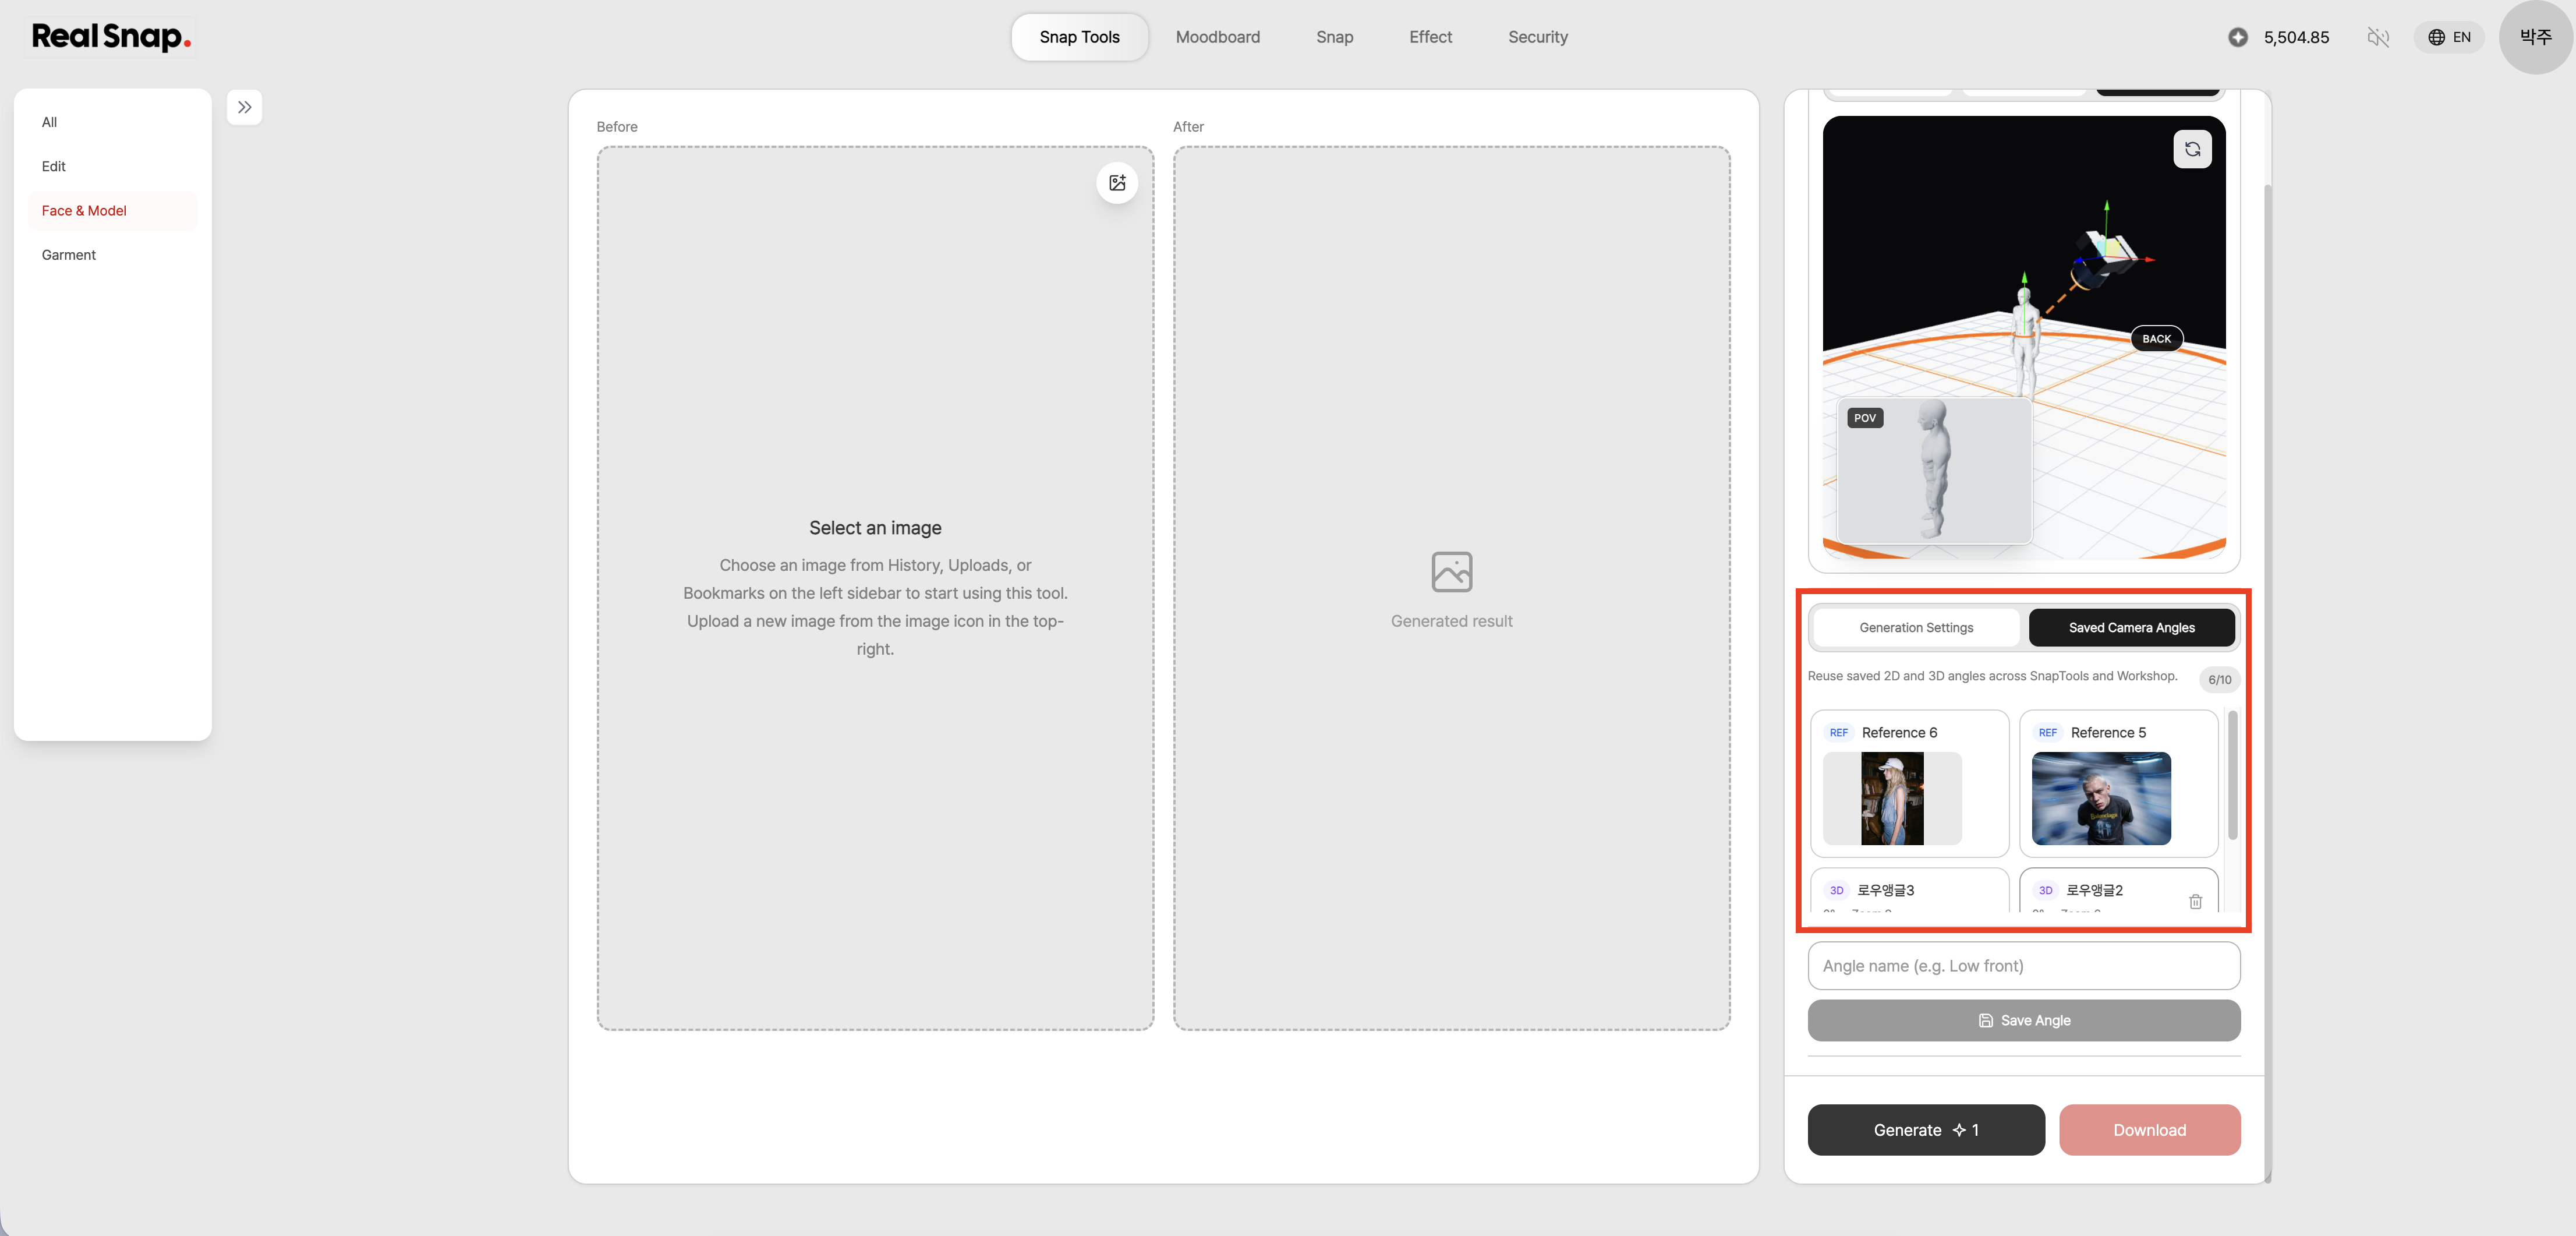
The Camera Angle feature has a Saved Camera Angles area where you can select saved compositions again and apply them right away.
If you load a preset saved from the Reference tab or an angle adjusted directly in 2D/3D from the list, you can quickly apply the same shooting composition to your current work.
This feature is especially useful for lookbooks, product detail pages, and banner work where composition consistency across multiple images needs to be maintained.
How to use
Open the Camera Angle feature.
If you have a desired shooting composition, upload a reference image in the Reference tab.
If needed, save the composition with Save as preset.
If you want to adjust it directly, choose 2D Orbit or 3D Camera mode.
Adjust the direction and Zoom value to set the desired composition.
If you want to use a saved composition, select it from Saved Camera Angles.
Click Apply to apply the composition to your current work.
Click Generate to see the result with a different camera angle using the same outfit.
💡 Things to keep in mind
If you’re using the image for sales purposes, make sure the actual product’s fit, length, and silhouette still look natural after changing the camera angle.
Especially when there are major viewpoint changes such as side, back, high-angle, or low-angle views, it’s a good idea to review whether the clothing proportions or product shape feel different from the original.
When using a Reference image, it’s best to use an image where the desired composition is clearly visible.If the composition is ambiguous or too complex, it may be difficult to accurately reflect the desired viewpoint.
Also, even when saving and repeatedly using presets, it’s a good idea to double-check whether the composition works best for the product type.
Conclusion
With RealSnap’s Camera Angle feature, you can create new images by changing only the shooting composition while maintaining the same outfit and mood.
Reference tab lets you upload an image with the composition you want to create results from a similar viewpoint, and you can save that composition as a preset to reuse it in future work.
If you need model shot variations such as front, side, back, close-up, high-angle, or low-angle views, try using the Camera Angle feature as part of your workflow.